Showing posts with label technique. Show all posts

Saturday, October 4, 2014

Kinda Eclectic Scrap Page

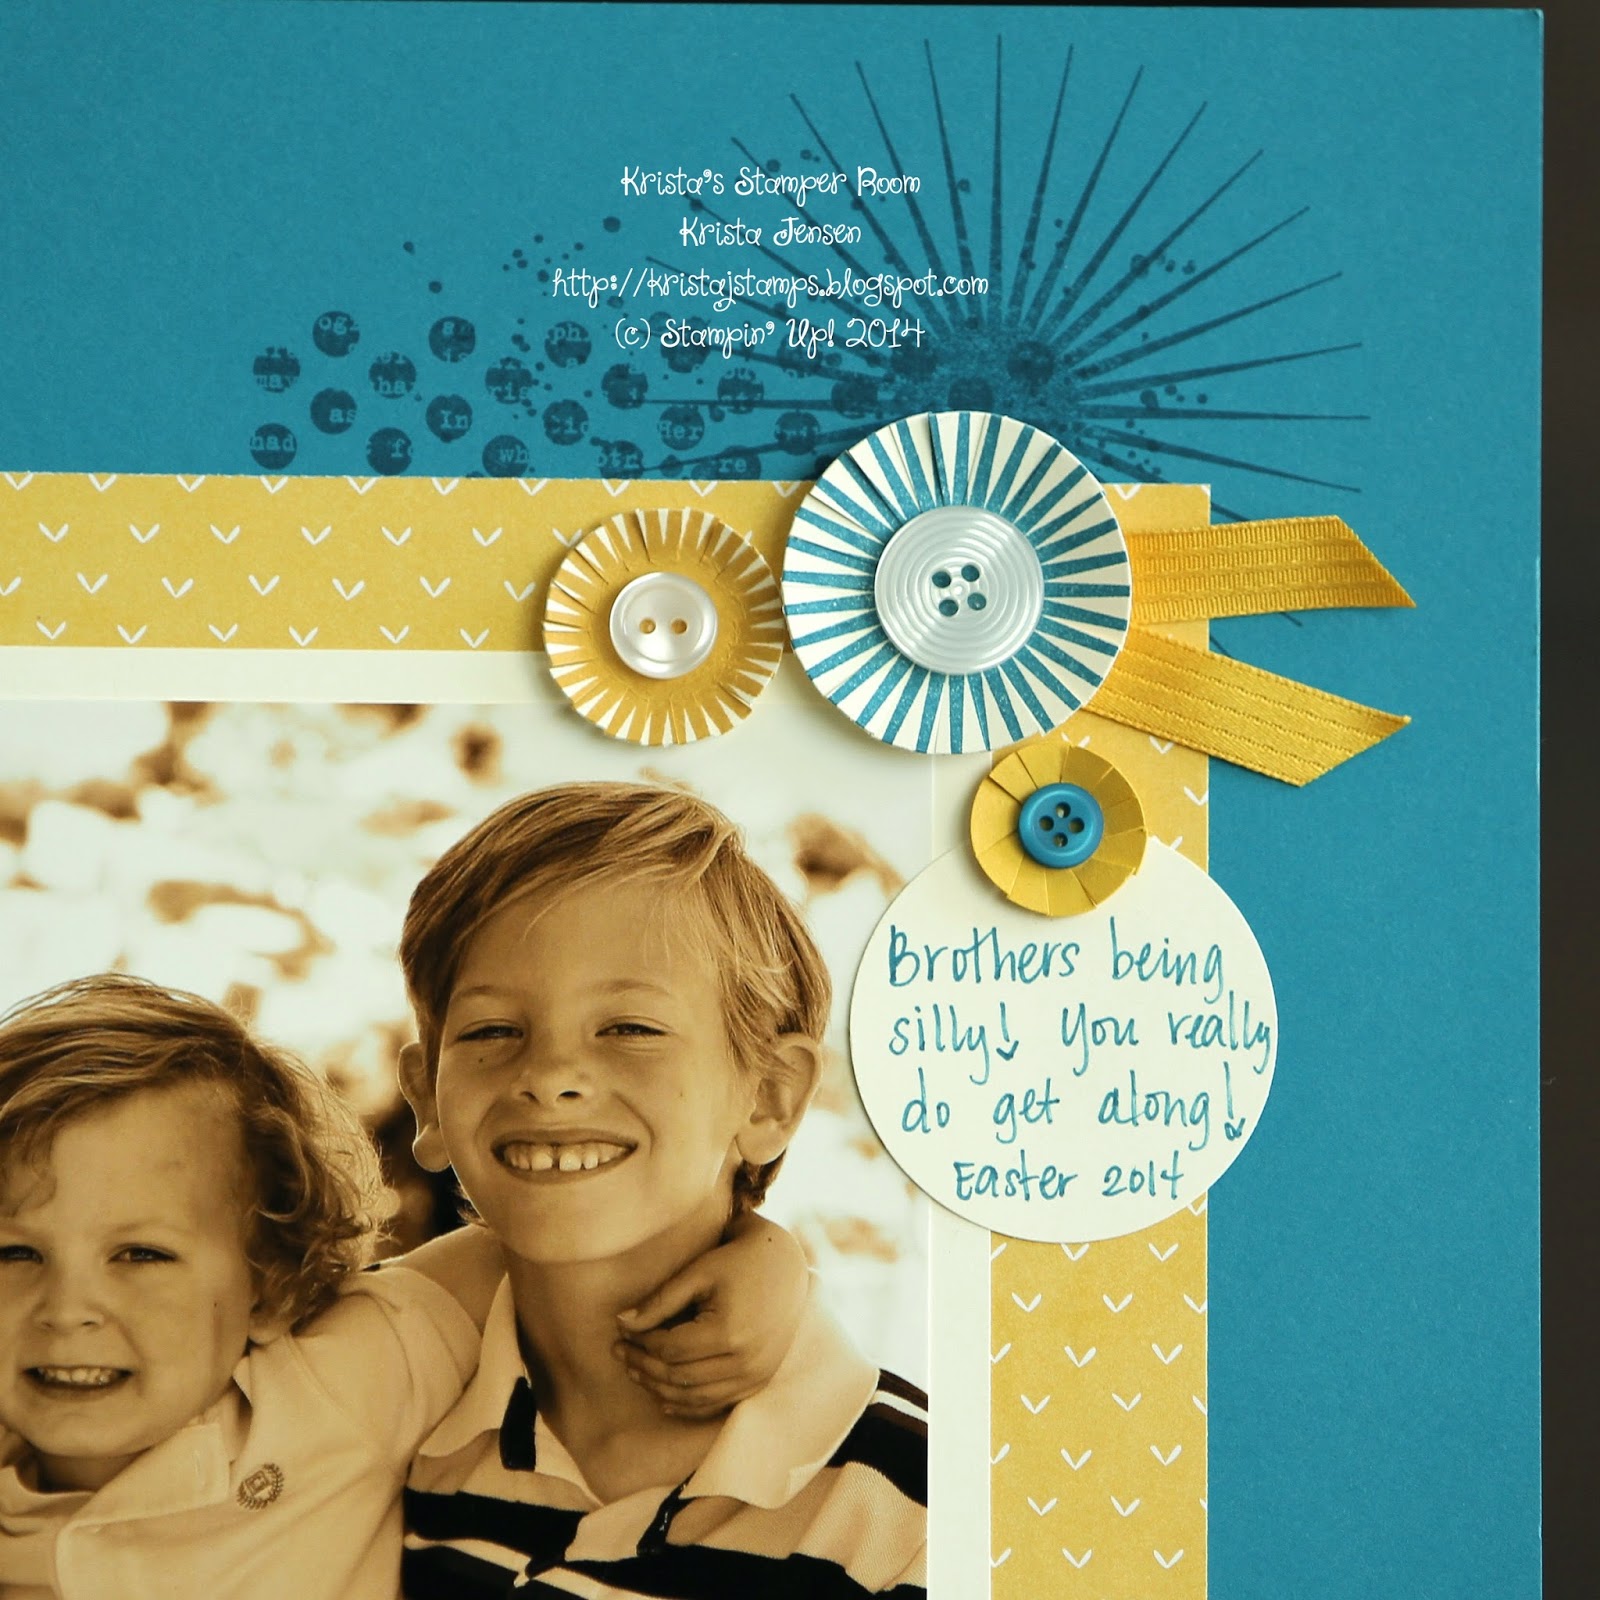
This is my favorite scrapbook page that I made for this years Stampin' Up! Convention Display Boards.  The set I used was Kinda Eclectic.  Colors are Island Indigo, Hello Honey and Very Vanilla.


 It's fun to take a stamp and use it "out of the box"....check out the circles on this page.  I stamped the sunburst image then punched it out with different sized circle punches.  Then I cut them to almost give a look of flower petals.  It makes it more acceptable for a page with a photo of my 3 boys, right?


Add a little button in the middle too....fun!


Hop on over to the Pinterest Board and check out all of the GORGEOUS creations from the Display Stampers for the SU! Convention 2014. Click HERE to see the board.


Happy Stamping,
Krista

Thursday, August 21, 2014

Canvas Mounted Scrapbook Page, Kinda Eclectic

You know those projects you make that you just fall in love with?  Well this is one of them for me.  The bright colors, the bits of sparkle and my cute family all mounted on to an 8"x10" canvas.
Love it!


I used the Sweet Taffy DSP with Daffodil Delight cardstock for the base.  I stamped the starburst image on the Daffodil Delight cardstock with Versamark and then embossed it with clear embossing powder.  I made a Melon Mambo spiral flower.  Stamped more of the Kinda Eclectic images and cut them out.  On the flower I attached strands of ribbon, sequins and bakers twine.  Pearls on the butterfly too. I added the tiny punched flowers with pearls and there you have it.

Mounting the page onto the canvas:
BEFORE you add ANY embellishments, use mod podge all over the canvas in a thin layer.  Softly press the base of the page onto the canvas.  Curl and press the edges on too.  Turn the canvas over and flatten and press with your hands to smooth out the page base cardstock.  

After it's all dried, then go back and add the embellishments.


Happy Stamping!
Krista


Tuesday, August 12, 2014

Queen Mary Vintage Birthday

It's time for a color challenge at Hand Stamped Sentiments.  I wanted to go with a non-Christmas card with these colors.  When I was scanning through my stamps this one struck me as the one!  It's called "Traveler".  It looks like the Queen Mary that's docked out here in Long Beach, California.  It's a major tourist attraction.  The little pop of Cherry Cobbler was a perfect fit. 


Hop on over there to Hand Stamped Sentiments and join us for the fun!!


Happy Stamping,
Krista

Saturday, August 9, 2014

Kinda Eclectic Vintage Style

I've said it before and I'll say it again....Kinda Eclectic is very versatile.  Take this card, for instance, I gave it a real vintage look. 


I used Hello Honey and Daffodil Delight for the yellow tones.  I stamped the leaves with a fully inked stamped, then stamped it off onto another paper then stamped the image again onto the Very Vanilla cardstock.  I did that with both colors to give it the faded look.  I stamped the greeting in Basic Gray, and added some Hello Honey ribbon.
I added some Basic Gray cardstock for layering, some banners, gold sequins, 2 other stamped images in the background and there you have it!


HAPPY STAMPING,
KRISTA


Thursday, July 31, 2014

Give Thanks With Seasonally Scattered

3D PROJECT TIME!!
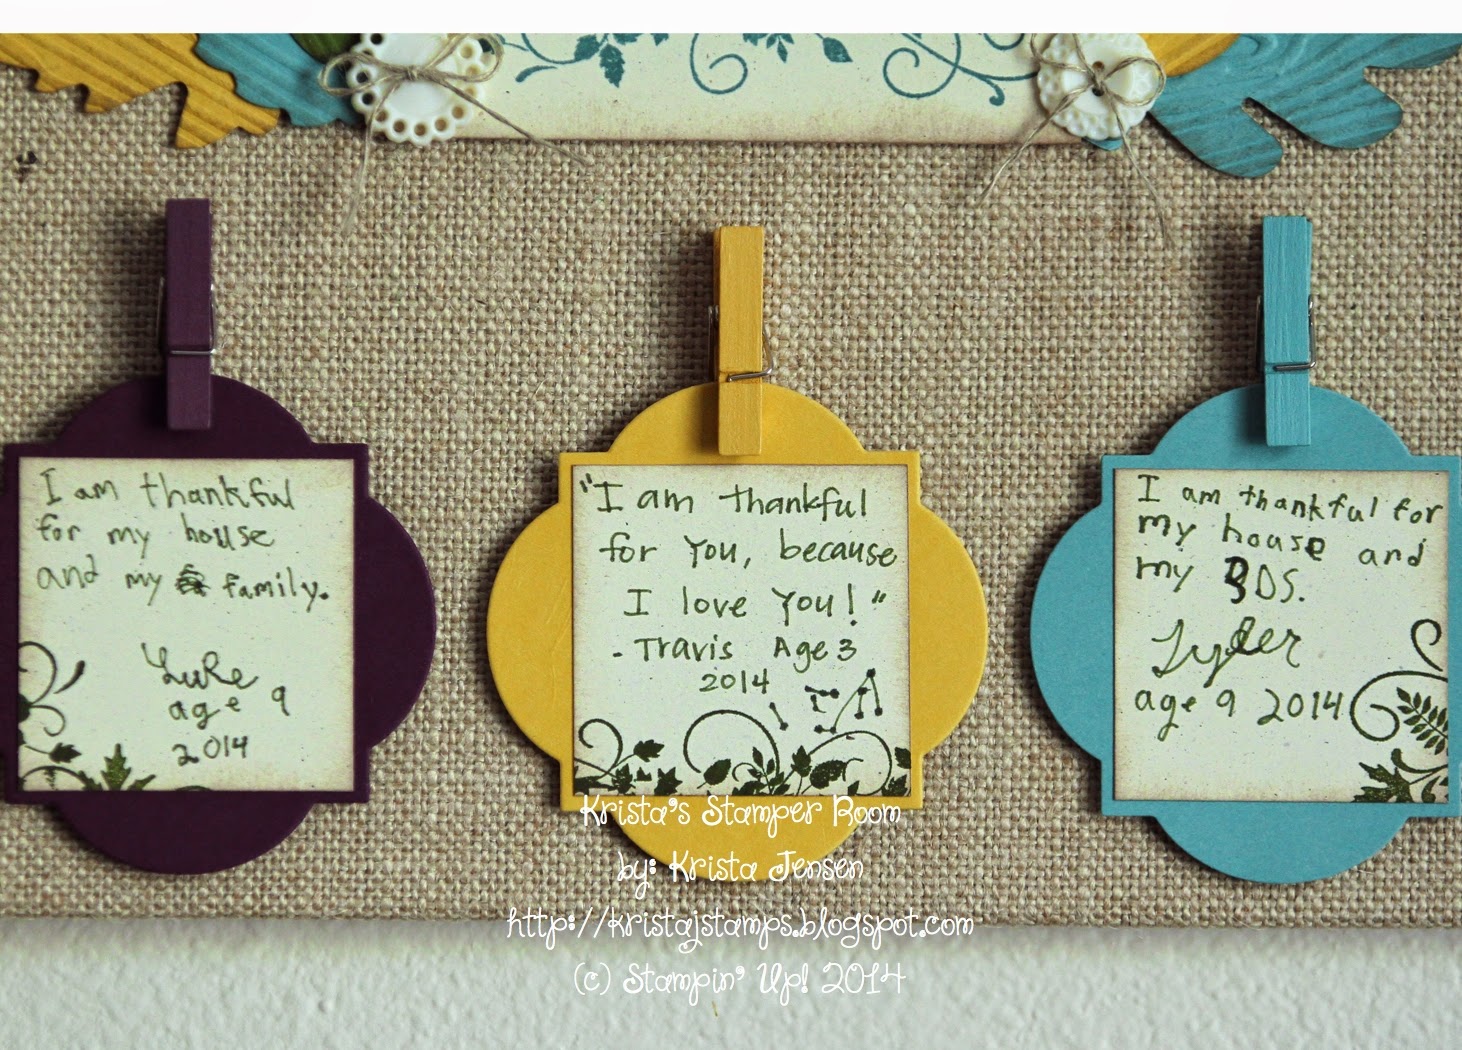
I found a gem at Michaels....Burlap covered FLAT canvases.  Oh my, so cute!  I wanted to use it for a Convention Display Board Sample.  This is what I came up with...a "GIVE THANKS MEMORY KEEPER"


I asked my 3 boys to each write something they are thankful for.  (I wrote the one for Travis, since he's just 3, but he did tell me what to write).
So cute, huh?!  I hot glued the clothespins down and then used them to clip on the little thankful notes.  Each thankful note has a little bit of the "thanks" stamp image.  The backing is a Window Collection Framelit.
I can have the boys write a new note each year and just clip it onto the clothespin.


I used the Autumn Accents Die for the leaves and then embossed them with the Woodgrain Embossing Folder.  Added some Vintage buttons topped with some linen thread.
The "give" is cut from a stamp set in MDS cut out with my Silhouette Cameo.  I stamped the "thanks" image onto Naturals Ivory cardstock and then stamped it again onto Hello Honey.  I hand cut aka "fussy cut" the letters out of the Hello Honey and put it onto the other stamped image to draw more attention to the word.  I sponged the edges with Soft Suede to add a soft look.


These are the boys that wrote these adorable thankful notes:


Make sure you follow all of the Display Stampers on our Pinterest Board. Click HERE for the board.


HAPPY STAMPING,
KRISTA


Wednesday, July 30, 2014

Love Seasonally Scattered Part 2

I think this card was quite clever. Don't ya think?!  This one was on the Display Board at the Stampin' Up! Convention.  Woot!!


To make the "LOVE" cloud:
1. Stamp image in Pool Party ink on Whisper White Cardstock.
2. Randomly, free-hand cut out stamped image into the shape of a cloud.
3.  Lay the cut out image over Silver Foil Paper...following the same pattern of the cloud, cut around it
leaving at least a 1/8" edge so it gives a layered look.
There you have it....EVERY CLOUD HAS A SILVER LINING!!  

To make the Background:
1.  Cut one edge of a piece of heavy cardstock or the packaging for your DSP into a random scalloped edge.
2.  Ink up a sponge with the Pool Party ink pad.
3. Lay the template onto your card front...toward the top of your card and start sponging just along the edges of the template. 
4. Slide the template down and shift to one side then sponge it again.
5.  Continue sponging the entire cardfront until you get the look you want.

To make the tiny 3D hearts:
1.  Punch out 3 tiny hearts from the Itty Bitty Accents Punch Pack for each of the hanging hearts.
2. Crease each heart in half.
3. Adhere one heart flap to another one...using 3 for each 3D heart.
4. Glue it down where you'd want it.

I hope the instructions make sense.  I will do my best to answer any questions you have in the comments section.  Or you can email me at kristajstamps@gmail.com
I guess it's time for me to breakdown and start making some video tutorials.  LOL!


Make sure you follow all of the Display Stampers on our Pinterest Board. Click HERE for the board.  


Thursday, July 24, 2014

Seasonally Scattered Thanks

 Sometimes you see a stamp set and think....what in the world will I make with that?  Well, that is this set, Simply Scattered.  But after playing with it, I found myself having a little bit of fun!  
I love making SIMPLE cards....stuff you can do in a class.  This card is no exception. 
I took markers (tempting Turquoise, Rich Razzleberry, Melon Mambo, Pumpkin Pie, Daffodil Delight and Old Olive)...colored them directly on to the stamp, huffed on it a bit and stamped it onto white cardstock.


I added it to a layer of Melon Mambo and then a Whisper White card.  Topped it off with some rhinestones, and that's it!  Easy, simple, clean and fun!

Don't forget to follow us on Pinterest.  Click HERE for the pin board.


Happy Stamping,
Krista

Tuesday, May 20, 2014

Vivid Vases For Mom

I chose to use some bright colors this week.  It's so bright and sunny out here in Southern California and I was inspired!  


I made this card for my mom and my mother-in-law for Mother's Day!  Here is a picture of my sister, my mom and me....


My mom is so pretty and she's such an amazing person inside and out!!!  I love you mom...aka....Sizz!  LOL


Hop on over to Hand Stamped Sentiments and play along!!


Happy Stamping,
Krista 


Tuesday, April 8, 2014

HSS Color Challenge You Made My Day


This week at Hand Stamped Sentiments is a color challenge.  A friend of mine found a new technique on Splitcoast Stampers called Alcohol Resist Technique.  I wanted to try it.  Look at the lower half of the card...I embossed it with an embossing folder.  Tapped Versamark ink on it, poured clear embossing powder on it, tapped it off and heated it up until it left a shiny surface.
Then I took a spray bottle filled with rubbing alcohol and a few drops of Gumball Green ink refill.  Spritzed that on the embossed paper and then wiped off the excess.  

This is what I came up with....


Stamps: Petite Petals, A Dozen Thoughts

Happy Stamping,
Krista


Tuesday, April 1, 2014

Oma and Opa Scrapbook Page

Be inspired this month at Stampin' Celebration!  Here are some beautiful pictures to help you!!


I immediately thought these photos would make a gorgeous scrapbook page.  I'm really loving everything GOLD right now.  I found this awesome picture of my Grandparents taken just a month ago.  Aren't they cute?!  I am truly blessed to have them!!  I can't wait to frame this!!  Soon I will be making one for my other set of grandparents....YES I still have them in my life, too!!  I am one truly blessed granddaughter!!


Here are some close ups of those lovely flowers...see the sanding on the "core-dinations" cardstock?!


Ingredients...
Colors: Baked Brown Sugar, Soft Suede, Early Espresso, Sahara Sand, Very Vanilla
Stamps:  Off The Grid, Fabulous Florets
Accessories: Gold foil paper, core-dinations cardstock, gold sequins, gold embossing powder, pearls, Victoria crochet trim.

Don't recognize the leaves as a die cut?  Well....it's actually a stamp image on MDS from the Betsy's Blossom stamp set.  I used my Silhouette Cameo to enlarge the image and cut it out.  Cool, huh?!?

Happy Stamping,
Krista

Friday, March 21, 2014

Fab Friday Word Bubble


I wanted to experiment with the word bubble framelits.  I saw this blog post from Stampin' Up. This fun sketch came up, perfect chance to do these techniques....here it is...


Starting at the stamped image, here are the instructions...
1. I stamped the image, die cut the word bubble, cut out around the word bubble to make a frame, glued it to the stamped image and cut it out.
2. The Calypso Coral is the positive and negative image of the die cut.
3.  The top word bubble is actually an "embossed" image of the die.  I put it flat side on the cardstock then cut out around the "embossed" edge.
4. The silver glimmer paper solid word bubble is the positive image.

Ingredients:
Stamps- Just Sayin' 
Colors- Calypso Coral, Crisp Cantaloupe, Whisper White
Accessories- Word Bubbles Framelits, Silver Glimmer Paper, Stripes Embossing Folder

Now hop on over to Fab Friday and check it out....they've got some cute stuff!!


Happy Stamping,
Krista

Saturday, March 1, 2014

Celebrate at Stampin' Celebration

The inspiration photos this week at Stampin' Celebration are so soft and pretty!!  


I wanted to use a little bit of each photo to inspire my project.  I found these cute little clear pillow boxes at Clearbags.com.  And they were on clearance!  Even better!!


I added some really cool Spiral Flower Die cut flowers in Wisteria Wonder, and a fringe scissor cut leafy thing...hee hee. Then some of the Petite Petals punched flowers in White and a cute celebrate banner.  For the belly band I cut a 2"x7-1/2" then used the Tag Topper punch to finish the edges and to tie it together with the taffeta ribbon.

Friday, February 28, 2014

Celebrate Gold

I am in the middle of creating projects for my next class.  We are going to make cards using new products.  I needed some inspiration and found a really cool sketch at Freshly Made Sketches.  Here is what I came up with....


Here is a close up of the details.  


I used the Vellum with Gold accents, I used the gold foil paper and embossed it with the Decorative Dots Embossing Folder.  I cut out the shapes using the Starburst Framelits.  The stamp is from the Starburst Saying stamp set and I heat embossed that with Gold Embossing powder.  I finished it all off with some white bakers twine and Gold Sequins.  


Check out the other fun designs at Freshly Made Sketches.


Happy Stamping,
Krista

Monday, February 3, 2014

Sponged Birthday Polka Dots


I joined a challenge today over at Fab Friday and The Friday Mashup.  Here is my entry....


How did I get those AMAZING polka dots on the background you ask??  I used the sponge dauber and dipped it in the Real Red ink refill.  Part of the challenge at the Friday Mashup was to "sponge" part of your project...this works, right?!  :)


Ingredients:
Colors: Coastal Cabana, Real Red, Crumb Cake and Whisper White
Stamps: Gorgeous Grunge, Express Yourself
Punch: Chevron
Accessories: Fresh Prints DSP, Crumb Cake button, Linen Thread


Hop on over to THESE blogs and check out the challenges!!


Happy Stamping,
Krista

Wednesday, January 15, 2014

Vivid Vases

I am so excited to be using so many new products from the Occasions Catalog.  I love, love, love this new individual stamp!  The flowers, the clean lines, the font, the saying...it's a must have!
I wanted to show you this fun stamp in a sketch brought to you by the Design Team at Stampin' Celebration!  It's a great way to start the year...join us today!!  


Here is the awesome sketch....


Don't forget to stop by and see all of the amazing creations from the talented Design Team.  Join us in the fun, too.  

Happy Stamping,
Krista

Tuesday, November 19, 2013

Falling Leaves in a Sketch

It's sketch time over at Hand Stamped Sentiments.  This may be my last Thanksgiving/Fall card this year.  Is it really the fall?  Seriously....it's been like 80 degrees PLUS here, until just a few days ago.  Finally it's like 65* today!  YAY!!  Anyways, back to stamping!!

Here is my card this week.  Looking at it here in the photo, I'm wishing I would have used a different color for the background.  Oh well...I still like the colors as a whole.


I did the "rock and roll" technique on the leaves.  I used Midnight Madness, Island Indigo, Crushed Curry, Cajun Craze, and Soft Suede.  It looks okay if I say so myself.  :)

Here is your sketch....hop on over there and join us this week!!


Happy Stamping,
Krista

Friday, November 1, 2013

Fall Owl

Be inspired this month at Stampin' Celebration!!  This time it's some warm colors and beautiful textures.  Check out these photos and let your imagination and creativity flow!!


It's at times like these that I desperately miss More Mustard!!  It was replaced this year with Crushed Curry....BOO!!  Okay, suck it up and go with it....
Here is my card that was inspired by the photos from the collage at Stampin' Celebration!


Check out those leaves and the flower.  I made some cuts to give them some texture...like the bouquet in the inspiration photo. I also used the "core-dinations" cardstock, embossed it then sanded it for the distressed, softer look.  Also adds some nice color variations.


And, of course, the owl punch...he's still so cute to me.  It's tough on my hands punching out all those layers, but so worth it!!

Check out the other beautiful creations by the Stampin' Celebration Design Team!
 

Happy Stamping,
Krista

Tuesday, October 22, 2013

Holly Jolly Christmas

It's time for a new challenge at Hand Stamped Sentiments.  This week it's a sketch.  The possibilities are endless with this one for sure!! Have fun with it and join us this week!!


Here is my take.  I did 3 layers of ribbon, a rosette with a stamped/embossed image from the set Tags 4 You and topped it off with some "core-dinations" cardstock, embossed and sanded.


Be sure to stop by Hand Stamped Sentiments and check out the other Design Team's creations!!

Happy Stamping,
Krista