Showing posts with label Home Decor. Show all posts

Wednesday, October 15, 2014

Give Thanks Fall Wood Block

I like to make decor items in my classes.  We made this one in my "Fall Fest" class.  

I bought a wood block from Hobby Lobby and stained it.  Then added the spiral flowers, stamped leaves from the Fall Fest stamp set and some gold leaves cut out using the Fun Fall Framelits.  I added some linen thread behind the flowers too.  A 4-1/4"x6-1/4" photo mat was directly adhered to the wood block and the clip holds the photo, recipe card, Bible Verse, etc. 

Here you have it....


 A close up of the flowers....


Don't you want to attend my classes now?!  
Happy Stamping,
~Krista

Thursday, August 21, 2014

Canvas Mounted Scrapbook Page, Kinda Eclectic

You know those projects you make that you just fall in love with?  Well this is one of them for me.  The bright colors, the bits of sparkle and my cute family all mounted on to an 8"x10" canvas.
Love it!


I used the Sweet Taffy DSP with Daffodil Delight cardstock for the base.  I stamped the starburst image on the Daffodil Delight cardstock with Versamark and then embossed it with clear embossing powder.  I made a Melon Mambo spiral flower.  Stamped more of the Kinda Eclectic images and cut them out.  On the flower I attached strands of ribbon, sequins and bakers twine.  Pearls on the butterfly too. I added the tiny punched flowers with pearls and there you have it.

Mounting the page onto the canvas:
BEFORE you add ANY embellishments, use mod podge all over the canvas in a thin layer.  Softly press the base of the page onto the canvas.  Curl and press the edges on too.  Turn the canvas over and flatten and press with your hands to smooth out the page base cardstock.  

After it's all dried, then go back and add the embellishments.


Happy Stamping!
Krista


Thursday, July 31, 2014

Give Thanks With Seasonally Scattered

3D PROJECT TIME!!
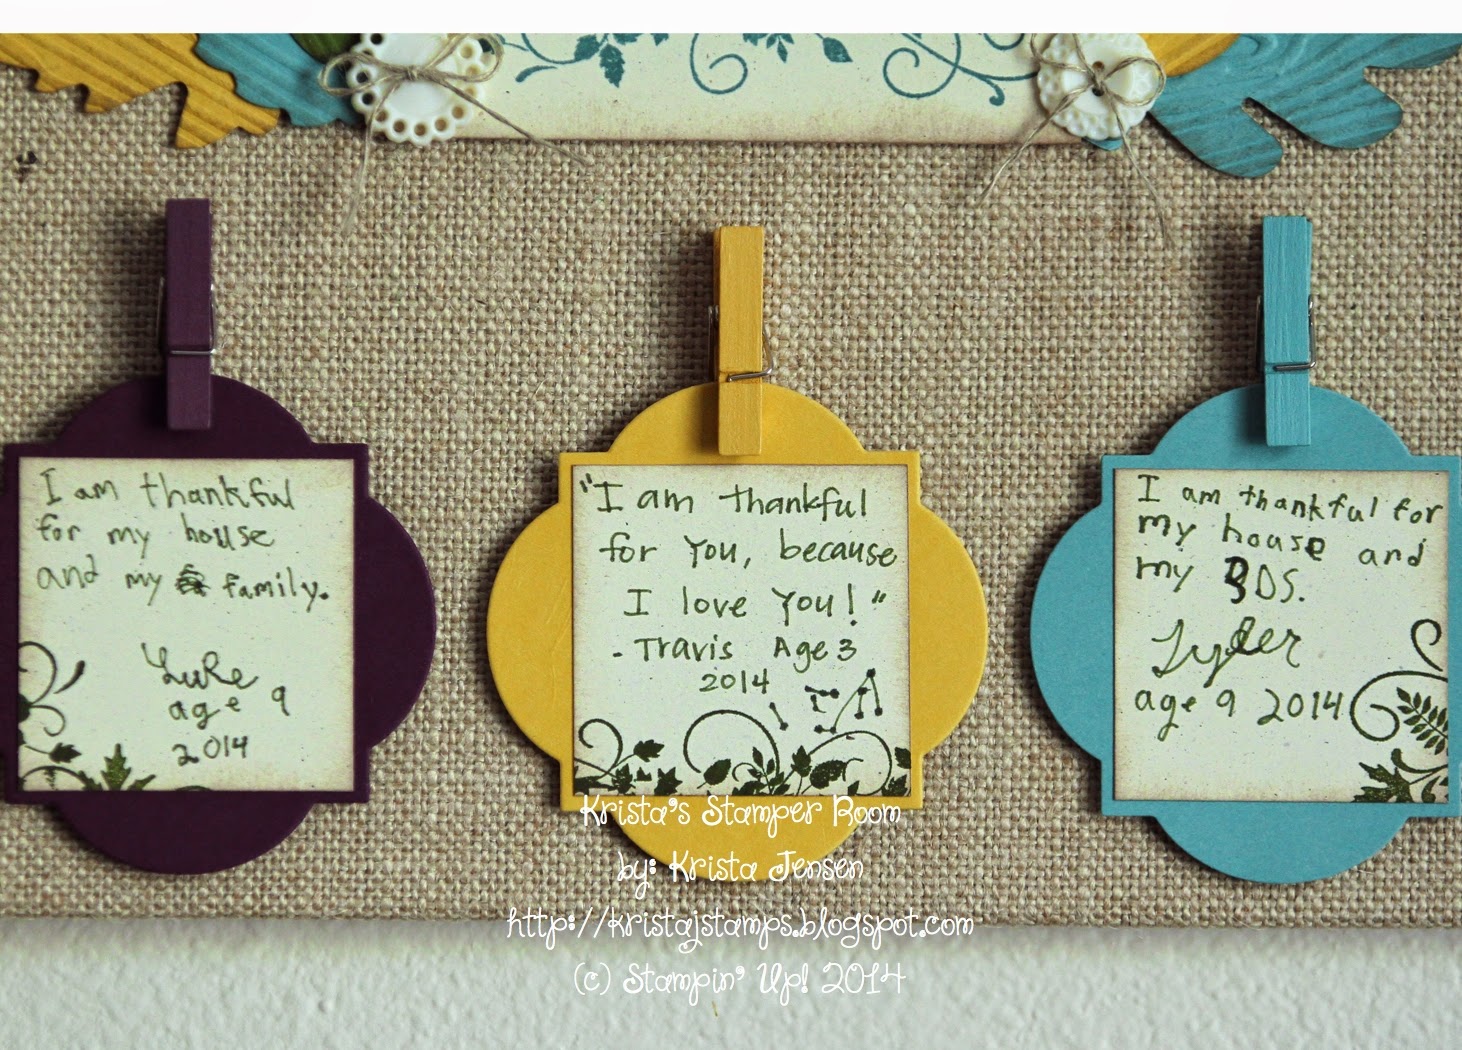
I found a gem at Michaels....Burlap covered FLAT canvases.  Oh my, so cute!  I wanted to use it for a Convention Display Board Sample.  This is what I came up with...a "GIVE THANKS MEMORY KEEPER"


I asked my 3 boys to each write something they are thankful for.  (I wrote the one for Travis, since he's just 3, but he did tell me what to write).
So cute, huh?!  I hot glued the clothespins down and then used them to clip on the little thankful notes.  Each thankful note has a little bit of the "thanks" stamp image.  The backing is a Window Collection Framelit.
I can have the boys write a new note each year and just clip it onto the clothespin.


I used the Autumn Accents Die for the leaves and then embossed them with the Woodgrain Embossing Folder.  Added some Vintage buttons topped with some linen thread.
The "give" is cut from a stamp set in MDS cut out with my Silhouette Cameo.  I stamped the "thanks" image onto Naturals Ivory cardstock and then stamped it again onto Hello Honey.  I hand cut aka "fussy cut" the letters out of the Hello Honey and put it onto the other stamped image to draw more attention to the word.  I sponged the edges with Soft Suede to add a soft look.


These are the boys that wrote these adorable thankful notes:


Make sure you follow all of the Display Stampers on our Pinterest Board. Click HERE for the board.


HAPPY STAMPING,
KRISTA


Tuesday, April 1, 2014

Oma and Opa Scrapbook Page

Be inspired this month at Stampin' Celebration!  Here are some beautiful pictures to help you!!


I immediately thought these photos would make a gorgeous scrapbook page.  I'm really loving everything GOLD right now.  I found this awesome picture of my Grandparents taken just a month ago.  Aren't they cute?!  I am truly blessed to have them!!  I can't wait to frame this!!  Soon I will be making one for my other set of grandparents....YES I still have them in my life, too!!  I am one truly blessed granddaughter!!


Here are some close ups of those lovely flowers...see the sanding on the "core-dinations" cardstock?!


Ingredients...
Colors: Baked Brown Sugar, Soft Suede, Early Espresso, Sahara Sand, Very Vanilla
Stamps:  Off The Grid, Fabulous Florets
Accessories: Gold foil paper, core-dinations cardstock, gold sequins, gold embossing powder, pearls, Victoria crochet trim.

Don't recognize the leaves as a die cut?  Well....it's actually a stamp image on MDS from the Betsy's Blossom stamp set.  I used my Silhouette Cameo to enlarge the image and cut it out.  Cool, huh?!?

Happy Stamping,
Krista

Tuesday, November 13, 2012

A Little Flake


It's finally getting cooler here....that means it's in the 60's-70's.  Burrr....right?!  Hee hee!  I think this week's challenge with a "snowflake" theme is taunting me.  Actually the snow capped mountains that are just to the North of me are taunting me.  I'm not much of a snow person, but those mountains make a nice backdrop.

Here is my project for this week....I saw this quilled snowflake on Pinterest and then found the tutorial on Martha Stewarts website.  Where else?  LOL!


Here is a shot of it straight on....


Here is the other side/angle....


Here are the instructions that I "borrowed" from my pal Martha:


Before working on the ornament, practice some quilling basics. Wind a strip of paper around the needle; it will form a tight curl. Play with the paper to stretch it back out to the shape you want. Try folding a strip in half and curling both ends in for a heart shape, or curl them out for a V shape. Quilling paper is easy to manipulate, but working with it is not an exact science: It takes some practice to make the same shape twice.

Tools and Materials

8 strips of quilling paper, 3/8-inch wide and 4 1/2-inch long
Quilling needle or round toothpick
Clear-drying craft glue
Metallic thread

Snowflake Ornament How-To

1. Fold each strip of quilling paper so that one of the halves is about 1/2 inch longer than the other, and curl the ends. Repeat with seven more strips.
2. On a flat surface, fit pieces together with their points in the center. Using tiny dabs of glue, attach pieces together in pairs, and then join the four pairs. Let glue dry, and attach a piece of metallic thread to hang ornament.
Tip: Use glue sparingly on quilling paper; dab it on with a toothpick to control the amount.


I won't take credit for the idea, but I will take credit that I DID make one.  It actually was pretty easy.  I thought about putting it on a card somehow, but I was running out of time....the kids were screaming for me.  I was hoping they wouldn't notice that I left the room.  Oh well, it was just long enough to whip up this adorable snowflake.

Happy Stamping!
Krista

Monday, September 10, 2012

BOO!!


Oh how I miss this Alphabet Die cut.  I just bought it before it retired!!  Oh well, it sure made a cute banner, right?!  This week's challenge at Hand Stamped Sentiments was to use and alphabet in your project.  Hop on over there and check out the awesome projects the other DT members made!!  


I use the new set called Googly Ghouls on this banner.  I also used the Silver Glimmer paper and the Howlstooth and Scaringbone DSP.   


Here is a close up of the letter....I wish I would have embossed this with the Chevron Embossing Folder.  I'll do it on the next one I make.  :)  Lovin' those googlie eyes, too!!


I used black taffeta ribbon to connect each part of the banner.  Cute little guy, right?!  LOL!


By the way, this is going to be the class project that I am hosting on September 30th.  Wanna come?

Happy Stamping!
~Krista

Monday, April 2, 2012

HSS Color Challenge....Goin' Girly

I know that I have 3 sons and a husband.....but sometimes it's fun to make a real girly thing for my home.  Join us this week for a color challenge at Hand Stamped Sentiments.


I love to make my canvases.  A few years back I was asked to do a demo at a group meeting for SU! Demonstrators and I put a few different ideas together and added my own touches and I came up with a scrapbook page mounted on to canvas.


The flower is the large and small scallop circle punches.  I punched the large one 5 times and the small one 4 times.  I wet them with a squirt bottle, crinkled them up and set them aside to dry.  Once they were dry, I folded 4 of each color in half and then layered them up and glued each layer down.  The 5th scallop circle is used as the backing for the flower.  I took my piercing tool, punched a hole and put in the antique brad.  Added a little Espresso Satin Ribbon tail.  Here is a close up:


For the background I did my take on Shelli's emboss resist demo she did at Convention 2008.  
First, I rolled the Very Vintage wheel on Vanilla CS using Early Espresso ink.  I inked it off a little, though.
Next, I inked the Flower image from the Elegant Trio Stencil with Versamark, sprinkled clear embossing powder then heated it with the heat tool to set the powder.
Then I took my sponges and sponged over the whole page with Rich Razzleberry, Pretty in Pink and Early Espresso. 
Here is a close up of the emboss resist:


Once I had all of the background paper done, then I spread Mod Podge all over the canvas in a nice thin layer and smoothed on the page WITHOUT the embellishments.  Then I laid the canvas on it's front and smoothed it out from the back.  The reason for this is that sometimes the canvas will get stretched out if you press to hard on the front of it.

I will be doing a class for these on Saturday, April 14th.  If you are interested in attending contact me directly. 


Ingredients
Colors:  Rich Razzleberry, Pretty In Pink, Early Espresso, Very Vanilla
Stamps: Jumbo Wheel Very Vintage 
Background:  Elegant Trio Stencil, Versamark, Clear Embossing Powder, Heat tool, Sponges, Inks
Flower:  2-3/8" and 1-3/4" Scallop Circle punches, Antique Brad
Other:  Early Espresso Satin Ribbon, Razzleberry Button, Linen Thread, Cutter Kit (Distressing the edges of the photo matting)
Non-SU:  Art Canvas, Mod Podge, Easel stand for display

Happy Stamping,
Krista